Whether you are a professional photographer or someone who simply loves capturing beautiful moments, our website, Canvas Prints Vancouver, offers a seamless experience to bring your images to life on premium-quality canvas. With our intuitive project creation tool and step-by-step tutorial, you can design your prints exactly the way you envision them. In this guide, we will walk you through the process of creating your own project on our website and highlight the tutorial that will help you make the most of our platform.
Why Create Your Own Canvas Print Project?
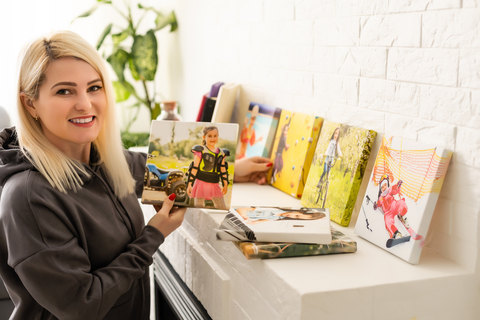
Creating your own canvas print project allows you to personalize every aspect of your artwork. Whether you’re looking to print family portraits, travel photography, wedding pictures, or custom artwork, our platform provides you with the flexibility and ease to do it all. Here’s why you should consider using our website for your next project:
- User-Friendly Interface: Our website is designed with ease of use in mind, making it simple for anyone to upload, edit, and order custom prints.
- High-Quality Materials: We use premium cotton canvas, vibrant UV-resistant inks, and sturdy wooden frames to ensure durability and a stunning finish.
- Customization Options: Choose from different sizes, layouts, and framing styles to suit your aesthetic.
- Fast and Free Shipping Across Canada: We deliver your artwork to your doorstep without any additional shipping charges.
- Handmade in Canada: Each canvas print is handcrafted with precision and care by our skilled team.
Now, let’s dive into how you can create your own project on Canvas Prints Vancouver.
Step 1: Getting Started on Your Project
Before you begin, ensure you have a high-resolution image that you’d like to print. The higher the resolution, the better the print quality will be. Once you have your image ready, follow these steps:
1. Visit Our Website
Navigate to Canvas Prints Vancouver and click on the “CREATE DESIGN” option. This will take you to our online design tool, where you can start customizing your print.
2. Upload Your Image
You can either log in or continue as a guest. Choose your design and select the picture you want to use. Make sure your image meets our resolution requirements to ensure high-quality printing. If the resolution is too low, our system will notify you to upload a higher-quality image.
3. Customize Your Canvas
Once your image is uploaded, you will have several customization options:
- Size Selection: Choose from a variety of standard sizes or enter custom dimensions.
- Frame Options: Select whether you want a gallery-wrapped frame, floating frame, or no frame.
- Edge Style: Decide if you want a mirrored, white, or black edge for your canvas.
- Color Adjustments: You can apply filters like black and white or sepia for a unique look.
4. Preview Your Design
Our preview feature allows you to see exactly how your canvas print will look before finalizing your order. Make sure everything is aligned and looks perfect.
5. Add to Cart and Checkout
Once you’re happy with your design, click “Add to Cart” and proceed to checkout. We offer secure payment options, and once your order is confirmed, we begin processing your custom print immediately.
Step 2: Using Our Tutorial for a Smooth Experience
To make the process even easier, we have a comprehensive tutorial on our website that walks you through each step. Here’s what you’ll find in our tutorial:
1. Video Walkthrough
We provide a step-by-step video tutorial showing you exactly how to upload, customize, and place your order. This visual guide makes it easy to follow along, even if you’re using our service for the first time.
2. FAQ Section
Have questions? Visit our FAQ section where we answer common inquiries about image quality, size recommendations, framing options, and more.
3. Troubleshooting Guide
Encountering an issue? Reach out to our support team through live chat or submit a support ticket, and we will get in touch as soon as possible!
4. Design Tips and Inspiration
Not sure how to create the perfect canvas print? Our tutorial also includes design tips and inspiration, helping you make choices that enhance the beauty of your artwork.
Step 3: Placing Your Order and Tracking Your Print
Once you have completed your design and checked out, you will receive a confirmation email with your order details. Here’s what happens next:
Processing Time
Your order is carefully prepared, printed, and stretched onto a wooden frame (if selected). This process typically takes a few business days.
Shipping
Once your print is ready, we ship it directly to your address. We provide free shipping across Canada, ensuring your artwork reaches you safely.
Tracking
You will receive a tracking number so you can monitor your shipment’s progress.
Step 4: Enjoy Your Custom Canvas Print
Once your canvas print arrives, all that’s left to do is display it! Whether you hang it in your living room, office, or gift it to a loved one, your custom print will add a personal and artistic touch to any space.
Pro Tips for Hanging Your Canvas Print:
- Use a level and measuring tape to ensure precise placement.
- Consider grouping multiple prints for a gallery wall effect.
- Keep your print away from direct sunlight to maintain color vibrancy over time.
Bringing Your Vision to Life
At Canvas Prints Vancouver, we believe that your memories and artwork deserve to be showcased in the best possible way. Our easy-to-use platform allows you to create high-quality, custom canvas prints with just a few clicks. Plus, with our detailed tutorial, you’ll have all the guidance you need to make your project a success.
Ready to get started? Head over to our website and create your own masterpiece today. Whether you’re printing a special memory, a piece of art, or a professional photograph, we’re here to help you bring your vision to life!